 Contact
 Andy's Parts Smarts
 Cart
Cart
Hello, Sign In!

Toyota MRS Spyder Parts

At Andy's Auto Sport, we carry a huge selection of Toyota MRS Spyder parts. We have everything from affordable MRS Spyder aftermarket parts to high-end Toyota MRS Spyder performance parts. We have an excellent selection of MRS Spyder custom parts, like body kits, carbon hoods, custom seats, and rims, to name a few. We also carry the factory-grade replacement MRS Spyder parts too, including MRS Spyder engine parts, MRS Spyder body parts, and other MRS Spyder auto parts. So please take a look at our MRS Spyder parts selection. We're confident you'll enjoy the experience!
Select Your Vehicle
EXTERIOR
INTERIOR

LIGHTS
PERFORMANCE
SUSPENSION
BRAKES
DRIVETRAIN
WHEELS
Popular Categories
Toyota MRS Spyder Parts
At Andy's Auto Sport, we carry a huge selection of Toyota MRS Spyder parts. We have everything from affordable MRS Spyder aftermarket parts to high-end Toyota MRS Spyder performance parts. We have an excellent selection of MRS Spyder custom parts, like body kits, carbon hoods, custom seats, and rims, to name a few. We also carry the factory-grade replacement MRS Spyder parts too, including MRS Spyder engine parts, MRS Spyder body parts, and other MRS Spyder auto parts. So please take a look at our MRS Spyder parts selection. We're confident you'll enjoy the experience!
EXTERIOR
INTERIOR
LIGHTS
PERFORMANCE
SUSPENSION
BRAKES
DRIVETRAIN
WHEELS
When you click on links to various merchants on this site and make a purchase, this can result in this site earning a commission. Affiliate programs and affiliations include, but are not limited to, the eBay Partner Network.
Not able to find what you are looking for?


TRD Toyota MR-S MRS ZZW30 Front Strut Bar Brace Tower Bar SPYDER MR2

Toyota MR2 SPYDER MRS 2002-2007 FULL LED Tail Lights Lamps Taillights PLUG&PLAY

01 - 05 TOYOTA MR2 SPYDER TRD PERFORMANCE ENGINE OIL FILLER CAP OEM BRAND NEW
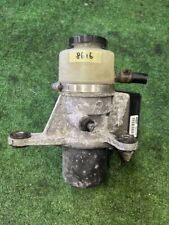
Toyota MR-S ZZW30 OEM Electric Power Steering Pump EHPS MR2 Spyder Genuine Parts

Fiberglass Triple Meter Gauge Pod Fit For Toyota Mrs MR-S MR2 Spyder ZZW30 00-05
DID YOU KNOW?
"Aftermarket" is a term used to describe parts that are not made by the factory. So for example, for your Toyota MRS Spyder, if you buy parts for your car that are not actually made by Toyota, then those are termed "aftermarket". Many people use the term "MRS Spyder aftermarket parts" specifically when referring to custom parts for the MRS Spyder, like performance parts or custom appearance parts. But even if you just replace your MRS Spyder brake pads with OEM-grade factory-style brake pads that are not made by Toyota, those too are aftermarket MRS Spyder parts. Over the course of a vehicle's life, it almost certainly will have aftermarket parts installed in it at some point, even if the vehicle is never actually "modded out".
Popular Categories
